Showing posts with label remodeling. Show all posts

Friday, November 17, 2017

Patio, Completed


We are thrilled with how the patio came out! The color is perfect!


The lights and fans are great. 


We found a local auction that had patio furniture. For a few hours of our time we found this set for about half of what we wee able to find it for anywhere else. Not a bad tradeoff! HD already spends more time out there than inside when he is home. He already has his sights set on an outside heater and a tv to mount on the wall. Looks like there will be even more parties out there!

Sunday, November 12, 2017

Patio Demo

So, since we do nothing easy or in order, we had a second project start before the kitchen was done.  As much as we entertain, we were ready to get our patio done so we could really use that outdoor space well. The trend here in Southern California is to have a rain-tight patio cover with lights, fans, tvs, and comfortable living room-type furniture. So that was our plan!


Bye Bye Old Patio cover!

Saturday, November 11, 2017

Kitchen, Part 6

This is what the wet bar area looked like before:


And this is after:


Although in these pictures it looks the same, the paint is 2 different colors from top to bottom. The new paint color is from Home Depot, Deep Crimson. It's really rich and beautiful. We have another project for this area but this is what it looks like for now. The cabinets hold a ton of stuff! And, it's amazing how much room a tiny bar sink can take up. We capped off the plumbing and it's in the wall now. No one uses a sink on their bar anymore-certainly not us! And we don't miss it at all. One thing I would have done differently in this area is to have measured the height of the shelves before they were removed so I would have some exact measurements to work with. While no one but me can really tell how much they are off, they are. HD wishes that we would have put under-shelf lighting under the middle shelf too. (It's currently only under the bottom shelf. I'm fine with it this way but he seems to think we should have. Oh well!)

Friday, November 10, 2017

Kitchen, Part 5

My sink came about the same time that the cabinets were coming out. This is a little peek at it. It is so beautiful! I think it might be my favorite part of the kitchen. A little back story....

Years ago when Pinterest started, I started a board called "Kitchen dreaming" where I put all sorts of kitchen ideas. At the time I didn't think we would ever do the kitchen. Ever. It was just fun to dream and add things that seemed like a good idea or would make life easier. That's what Pinterest is for, right?

Fast forward to this year when we started talking about actually doing the kitchen and I knew one thing: I wanted this sink.


Oh, how I love this sink! I was willing to give up a lot of things to be able to have this sink, including but not limited to food, water, or any number of things essential to life. It took us a while to find it, but thanks to the internet we were able to find it on SignatureHardware.com. Because of the material, we started doing a little homework to see if a marble sink was what we really wanted or could reasonably take care of. Turns out, it's not. HD called their customer service department and spoke with a really helpful guy who said that they only sell those sinks to really high end customers that never use their kitchens. Like, EVER. The material is so porous that you can't even really spill anything on it that has color to it with out wiping it up immediately or it will stain. We are an active household with children, and there is no way on God's green earth that nothing with color would get spilled on a SINK. So, it was back to the drawing board.

(I linked the company above because they were really honest and helpful, even if we didn't end up buying from them. That is integrity. I hope that someday we're able to use them for something because I think that kind of customer service deserves to be recognized!)

I did have a few other sinks on my board so that's where I started, and HD actually liked the copper ones. Cool. Those were a bit easier to find! We kept going back and forth between about 3 designs: plain, one with a vine pattern, and this one with the rings. I'm really glad that we chose this one from PremierCopperProducts.com. Their products are beautiful!

Thursday, November 9, 2017

Kitchen, Part 4

 The upper cabinets came out pretty quick. HD was out of town this particular week and I couldn't move the appliances out on my own, so they sat in the middle of the room for a day or two.

This portion of the old tile countertop was really strong. The guy doing the demo work had nothing left underneath and yet the counter stayed up. He banged and pounded and chipped away at it until it finally came down. He said in all the years that he's been doing this that he had never seen one this strong.

Also, above the counter you can see rectangle sections of the drywall that had been cut. This was where they were running the electrical for the new under cabinet lighting. We also moved the electrical outlets up and turned them sideways.


This is another good look at the holes that they put in all of the walls. They had to move the gas line and they put it in a recessed box so that the range would fit closer to the wall. The water line for the refrigerator was installed the same way.


This shows the framing that was added under the cabinets to raise them up to a finished height of about 37 inches. Standard cabinets/countertops are usually about 35-36 inches. I really love them being that little extra bit higher.


Libby thought the whole thing was pretty sketchy. She was definitely not a fan of construction!

Wednesday, November 8, 2017

Kitchen, Part 3

 This was the pantry.

 This was the wet bar.

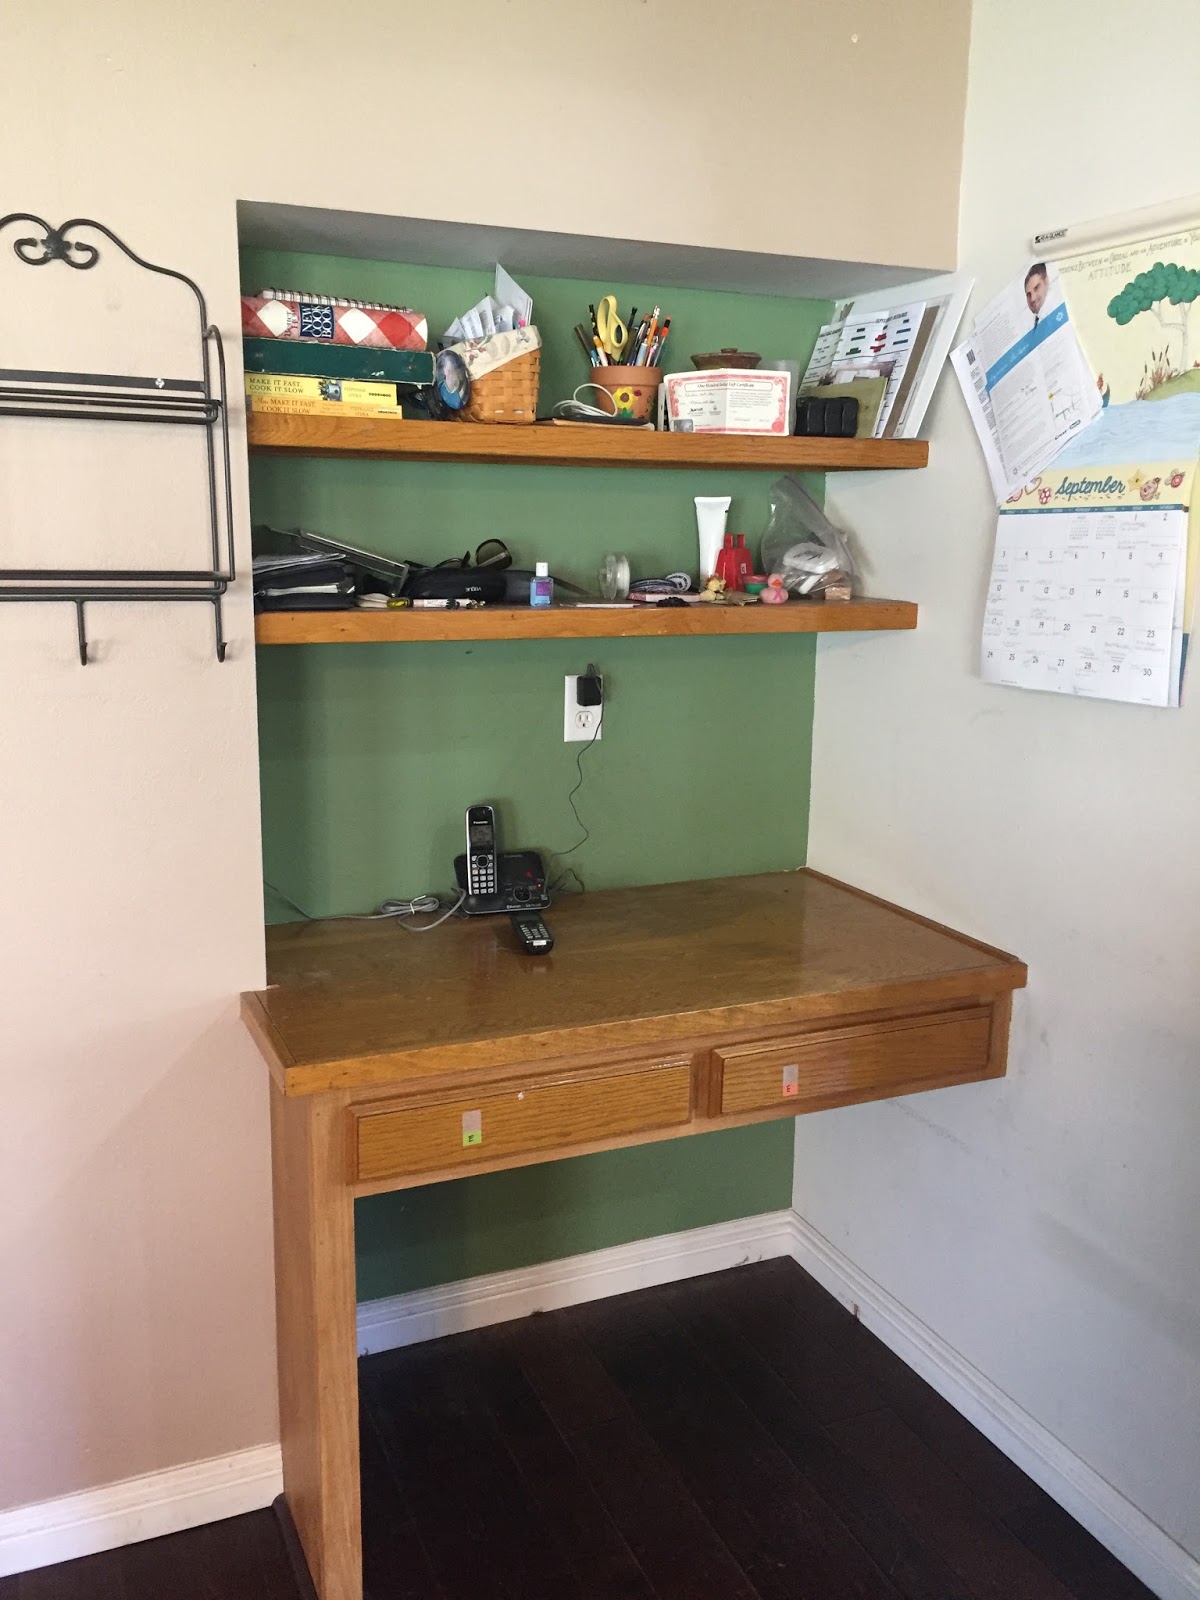
 My desk.

 The empty pantry.

 The empty desk nook.

 And the empty built-in bar.

 In this picture you can see where they removed a section of wall between the pantry and the desk.

This is a pretty good long view of the entire section of kitchen that they removed the first week. We were able to keep the rest of the kitchen functional for another week. In the mean time they installed cabinets, cut holes in the dry wall to run power for under cabinet lighting, etc.. This was back on September 25!

Next up: full destruction of the rest of the kitchen and the holes. Oh my word, the holes!

Tuesday, November 7, 2017

Kitchen, Part 2

 So we started making decisions. Granite was a huge one. He likes patterns and grains in the granite, I'm more of a solid color girl. Not good for decision making! I think our contractor probably wanted to shoot me by this point, and we hadn't even given her a deposit yet!

 We decided on what appears to be the most popular granite in Southern California, New Venetian Gold. But it is uniform enough for me, but enough of a pattern for him. Who knew?
The top picture also has a peek at the tile that we chose. Or at least one that is similar. Now that I'm looking at it, I don't think it's actually the one we chose. Close enough!

Monday, November 6, 2017

Kitchen, Part 1


This is what my kitchen looked like last spring when this whole process started. Well, mostly, anyway. This particular picture was taken to ask my Facebook friends what they loved and hated about their kitchens before we started to make decisions about ours. About 5 months later is when the decisions were actually made. 

We knew that we really didn't want to change the footprint of the kitchen, for two reasons. First, we really, really love our hardwood floors, (not pictured,) and to pull them up and have to have the seams matched, etc., would have been awful. Second, we actually like the way that our kitchen flows and how big it is. We talked some about getting a bigger stove, or moving the cooktop to the peninsula, but ultimately decided that it was perfect just the way it was. 

Looking at this now it's really hard to believe that it looked like this a few short weeks ago! In the coming days I'll share our process with you and ultimately give you some pros and cons, product reviews, and pictures of the final product! Stay tuned....

Tuesday, September 16, 2014

Getting it Done

You might remember that about 4 (5? I'll have to check,) years ago we had a flood in the house? It originated in the laundry room and in the fixing process I was able to repaint the room. It really came out pretty but it wasn't finished until yesterday. Ahem.

All I really had to do was put the finishing touches. This cute switch plate came from our trip to the Virgin Islands last year. The frog is perfect with the yellow wall color!

The gecko came from a trip my parents took to the Caribbean about 15 years ago. I love having him hang out to help with the laundry. You can see the curtain rod on the edge of the picture... We finally hung it yesterday. I have a simple sheer curtain on this window since I don't really need privacy there.

On the other side of the window hangs this washboard. Let me give you a closer look...

My grandfather made a few of these and I'm lucky enough to have one of them. It's a 'Receet for Washing Clothes' and has instructions for building the fire, which clothes to wash first, what to do with the dirty water, etc. My mother has always had hers hanging in her laundry room and I love that I have one, too.

I also cleaned out and organized our front hall closet. I pulled the extra shelves out of my son's closet earlier in the summer when we moved things around in his room and closet. While they don't fit all the way across, it works perfectly for my extra totebags. (I have a serious problem with bags. I should tell you about it sometime.) We also have a jacket problem. All of these jackets belong to me and Headless Dad. Not one belongs to the boys. Yes, we do live in Southern California, where we need them for about 4 days a year. I will say, however, that only about 1/3 of them are mine!

This is the bottom of the closet where the extra toilet paper lives with the rarely used (but really nice,) snorkel equipment lives. Before I cleaned out the closet you could not see the floor. The extra stuff that was in there went to live elsewhere or went into the Give Away bag. 

I am jazzed that I was able to get these things done... FINALLY!!

This post inspired by Melisa, who finally got a few of her favorite pictures on the wall and switched out her kitchen cabinets for better functionality. Go check it out and get some ideas!


Wednesday, February 15, 2012

I GIVE

First it was the bathroom.

Then the blog. (Yes I know I'm having loading problems. I'll get there.)

Now it's the roof. Actually dripping into my house.

OK UNIVERSE, I GIVE.
Headless Mom

Tuesday, February 7, 2012

Master Bathroom Shower: Before

Our latest project is our master bathroom shower, which we found to be leaking VERY badly last week. So, before we start ripping everything out I wanted to share what it looks like now.


Headless Mom

Thursday, October 13, 2011

Motivation

I'm trying something new today. Maybe putting this out there in public will help me get motivated.


This is a photo, straight out of my camera, of my living room. You might remember it looking like it did in this post, almost a year ago after our flood. No, there is not much change, thankyouverymuch.

My goal over the next couple of weeks is to get this room back in shape. Christmas is in about 10 weeks, (omgomgomg) and I REFUSE to have my house look like this when I'm trying to decorate for Christmas. Plus, after the crappy holiday season we had last year when my kids said that it didn't feel like Christmas, I'm determined to make it feel like Christmas this year.

The only part of this room that has been deep cleaned since that damn flood is the piano. I kinda had to since my #1 started taking piano lessons in June. Yes, there have been things that have been emptied out, but the rest of the room has not been cleaned. So. Here is a partial list of what has to be done:
  • transfer all of the files (in the middle of the floor) to the new filing cabinet
  • take the old computer to the e-recycling center (along with the full box that is in the garage)
  • find a home for the 2 boxes of board games, etc., that are in front of the pink chair on the left
  • wash and find a home for the extra blankets in the chair next to the bookcase
  • remove all books, etc., from bookcase and deep dust and clean all
  • vacuum, including the furniture
  • clean the inside of the windows and sills
  • find a home for all of the framed stuff that is slid in between the other furniture
  • get rid of all of the old National Geographic magazines
  • put my grandmother's quilt back on display behind the piano on the railing
  • rearrange furniture so we can put up the Christmas tree
See, I think it would be easy to do if I didn't have laundry, carpool, football, making meals, you know, a FAMILY TO TAKE CARE OF. 5 minutes here and there haven't made much progress so far but now you're all in on this. If you see me on fb, shoo me away. Email me to ask about progress. Text me and tell me to get my a@@ in gear. See? We're in this together.

I'll post pics every day or so to show you what I've gotten done. Hopefully I won't embarrass myself!

Headless Mom